
The 5 Essential Sailing Knots Every Good Sailor Must Master
An ancestral skill and a guarantee of safety at sea, mastering sailing knots is a fundamental competency for any boater, whether a seasoned veteran or a novice. More than just a tradition, the art of knot tying is a practical necessity that ensures the reliability of maneuvers, the strength of moorings, and ultimately, the peace of mind of the crew. In this comprehensive guide, we offer a detailed and visual tutorial to learn the five essential sailing knots that every good sailor should know by heart. From their specific uses to the key steps in tying them, along with tips to never forget them, you will have everything you need to become an expert with lines and ropes.
Sailing with confidence means, above all, being able to rely on your equipment and your skills. At the heart of this learning process is the knowledge of sailing knots. Indeed, whether it’s for mooring the boat, adjusting the sails, or securing equipment, a well-tied knot is the hallmark of a successful day on the water. Conversely, a poorly tied or inappropriate knot can have serious consequences. For this reason, we have selected the five most versatile and reliable sailing knots for you—the ones that will be useful in almost every situation you’ll encounter.
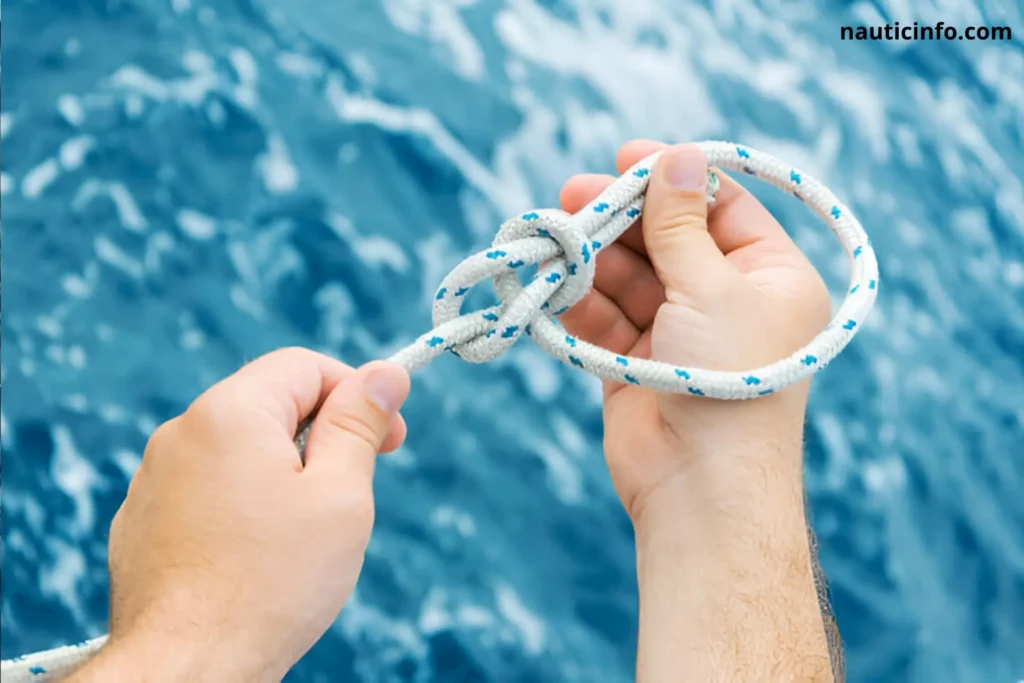
1. The Bowline Knot: The King of Sailing Knots
The bowline is undoubtedly the most famous and versatile of all sailing knots. Its main characteristic is forming a fixed loop that will neither tighten nor slip, even under very high tension. Consequently, it is incredibly reliable. Furthermore, it has the considerable advantage of being easy to untie, even after being under a heavy load.
Usefulness of the Bowline: An Ally for Numerous Maneuvers
This knot is a true multi-tool for the sailor. Firstly, it is ideal for attaching a halyard to a sail or securing a sheet. Secondly, it is frequently used to moor to a ring or a post. In addition, its strong and reliable loop can also be used to secure a person or equipment. For example, in an emergency, it can be fashioned into a makeshift harness.
Visual Tutorial to Tie the Bowline, One of the Most Important Sailing Knots
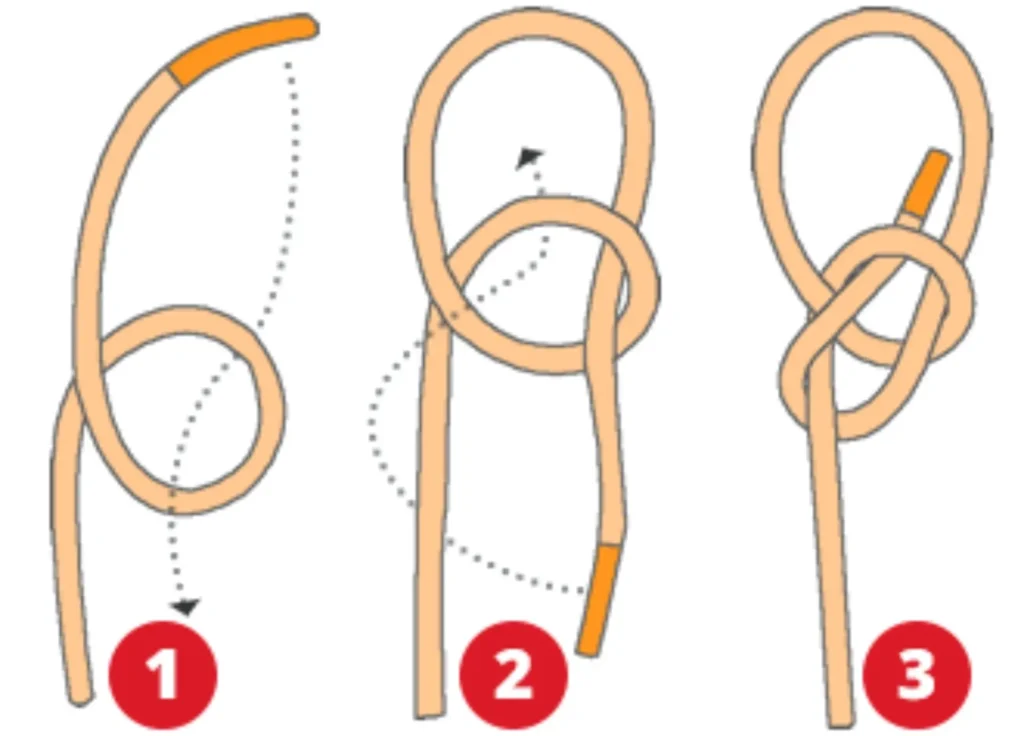
To remember how to tie a bowline, there’s a well-known mnemonic trick: the story of the rabbit coming out of the hole, going around the tree, and going back into the hole.
1: The Hole and the Rabbit Take the working end of the line (the “rabbit”) and form a small loop (the “hole”) on the standing part of the line. Make sure the working end passes over the standing part.
2: The Rabbit Comes Out of the Hole Pass the working end up through the loop you just created.
3: The Rabbit Goes Around the Tree Next, lead the working end around the back of the standing part (the “tree”).
4: The Rabbit Goes Back in the Hole Finally, pass the working end back down into the initial loop (the “hole”).
5: Tightening Pull on the standing part while also pulling on the loop and the working end to tighten the knot. The result is a solid, non-slip loop.
2. The Cleat Hitch: The Mooring Essential
The cleat hitch, as its name suggests, is specifically designed to secure a line to a cleat. It’s one of the sailing knots you will use most frequently, especially during mooring maneuvers in a harbor or at an anchorage. Its strength lies in its ability to be tied and untied quickly while providing excellent holding power.
Usefulness of the Cleat Hitch: Speed and Security for Your Mooring Lines
The primary use of the cleat hitch is to secure a mooring line to a cleat, either on the boat or on the dock. It allows you to easily adjust the line’s tension and cast it off just as easily, even when it’s under load. Moreover, it is also used to secure a halyard or a sheet on a mast or cockpit cleat.
Visual Tutorial to Master the Cleat Hitch, a Fundamental Sailing Knot
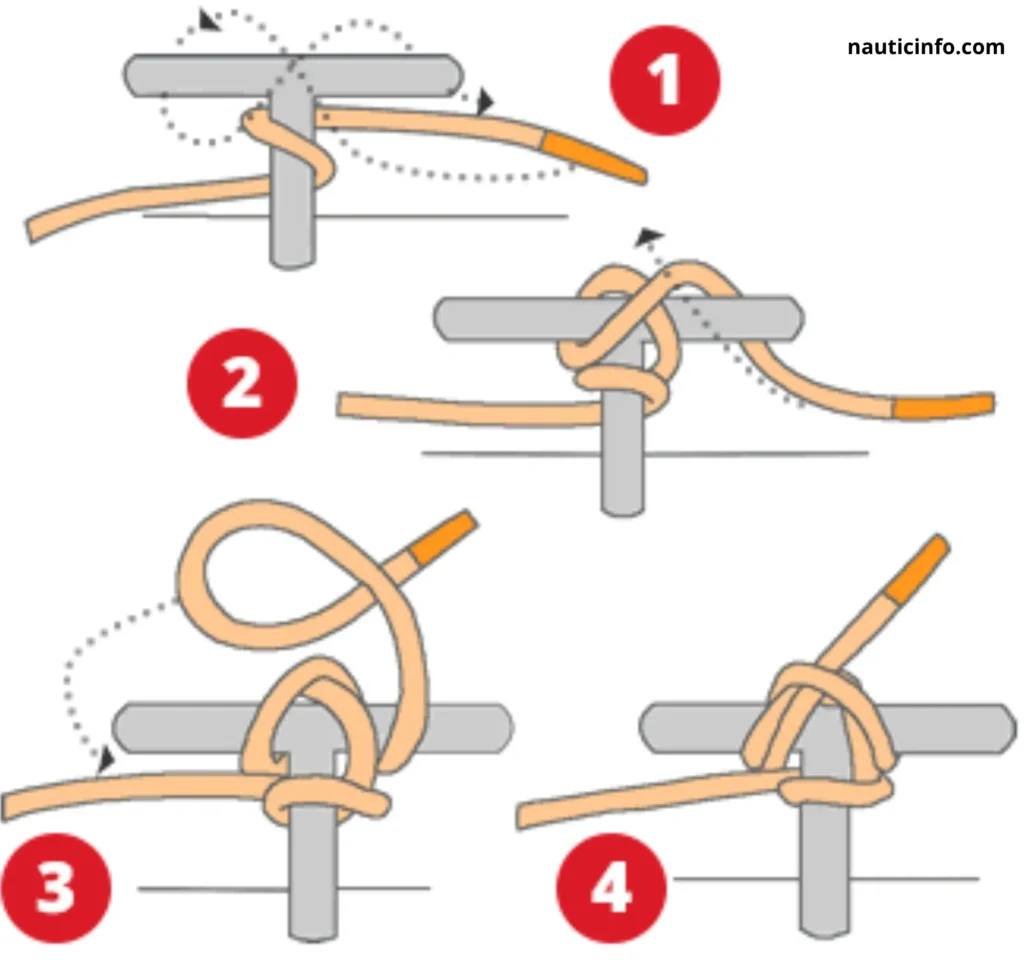
Tying a cleat hitch follows a simple, repetitive logic.
1: The Round Turn Start by taking one full turn around the base of the cleat with the line. This initial turn is essential as it absorbs much of the tension and prevents the knot from slipping.
2: The First Figure-Eight Next, lead the line diagonally across the top of the cleat to form the beginning of a figure-eight. Pass it under one of the cleat’s horns.
3: The Second Figure-Eight Continue the motion, forming a second figure-eight by passing over the center of the cleat and under the other horn. The line should cross over itself in the middle of the cleat.
4: The Half Hitch To finish and secure the knot, form a small bight (loop) with the working end, twist it, and slip it over the horn so the working end is underneath the last diagonal turn. The working end should exit parallel to the previous turn, neatly cinched down.
5: The Finished Knot Pull everything tight. A well-executed cleat hitch is neat, compact, and extremely secure.
3. The Clove Hitch: The Quick and Effective Fastener
The clove hitch is a very popular binding knot, particularly useful for securing a line to a cylindrical object like a piling, a mast, or a stanchion. Its greatest asset is its speed of execution. However, it’s important to note that it must remain under constant tension to be fully reliable.
Usefulness of the Clove Hitch: A Sailing Knot for Temporary Fixes
This knot is perfect for temporary uses. For instance, it is commonly used to tie fenders to the boat’s lifelines or railings. Likewise, it can be used to temporarily tie up a dinghy. However, for a long-term mooring or one subject to significant changes in tension, it is best to secure it with one or two additional half-hitches.
Visual Tutorial to Tie the Clove Hitch, a Classic Among Sailing Knots
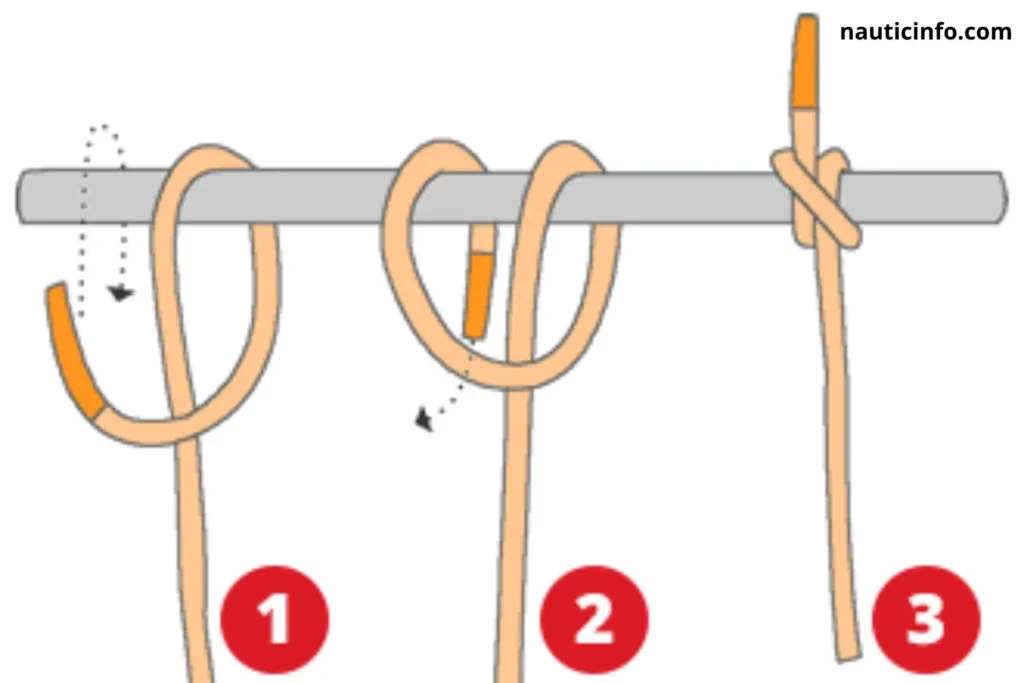
There are several methods for tying a clove hitch. Here is the most common one when tying it around an object.
1: First Turn Pass the line around the post or rail.
2: The Crossover Cross the working end over the standing part.
3: Second Turn Make a second turn around the support, in the same direction as the first.
4: The Final Tuck Tuck the working end under the second turn you just made.
5: Tightening Pull on both the working end and the standing part to tighten the knot against the support. A proper clove hitch should show two parallel strands on one side and a diagonal crossover on the other.
4. The Figure-Eight Knot: The Ultimate Stopper Knot
Simple, effective, and easy to untie, the figure-eight knot is the stopper knot that every sailor must know. Its main function is to prevent a line from running out through a block, pulley, or jammer by creating bulk at its end.
Usefulness of the Figure-Eight: A Sailing Knot to Keep Lines in Check
The use of a figure-eight knot is almost mandatory at the end of sheets, halyards, or reefing lines. In effect, by forming a “stopper” larger than the diameter of the line, it prevents the mishap of a sheet running completely through a pulley or a halyard disappearing up the mast. Therefore, it is a simple but critical safety feature.
Visual Tutorial to Learn the Figure-Eight, a Staple of Sailing Knots
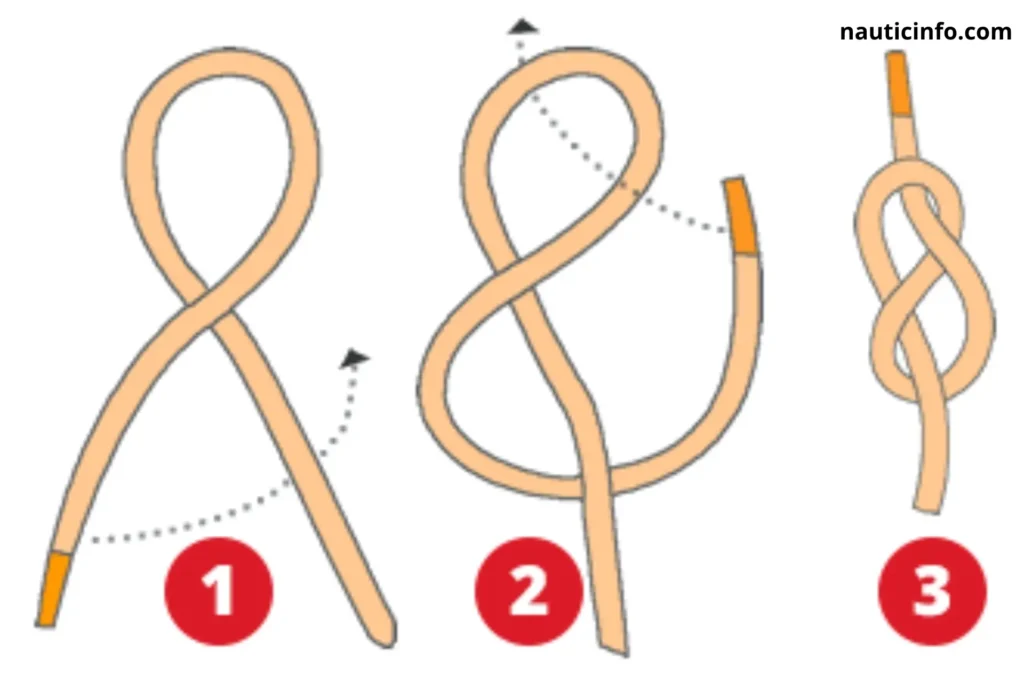
Tying a figure-eight is incredibly easy, and its name is an excellent mnemonic.
1: The First Loop Take the end of the line and form a loop.
2: Pass Behind Then, pass the working end behind the standing part.
3: Back Through the Loop Bring the working end back to the front and pass it through the initial loop.
4: Tightening Pull on the working end to tighten the knot. You should clearly see an “8” shape form.
5. The Round Turn and Two Half-Hitches: Safety First
The round turn and two half-hitches is more of a combination than a single knot, but its effectiveness and reliability make it indispensable. It is an extremely secure method for tying a line to a fixed point, whether it is cylindrical or not. The old sailor’s saying, “a round turn and two half-hitches have never failed,” speaks to its stellar reputation.
Usefulness of the Round Turn and Two Half-Hitches: One of the Most Reliable Sailing Knots
This combination is ideal for a long-term mooring or any situation requiring maximum security. The round turn takes most of the strain and prevents the line from chafing, while the two half-hitches provide a perfect lock. For example, it is used to attach an anchor to its rode or for an extended mooring to a ring.
Visual Tutorial for the Round Turn and Two Half-Hitches, the Secure Choice Among Sailing Knots
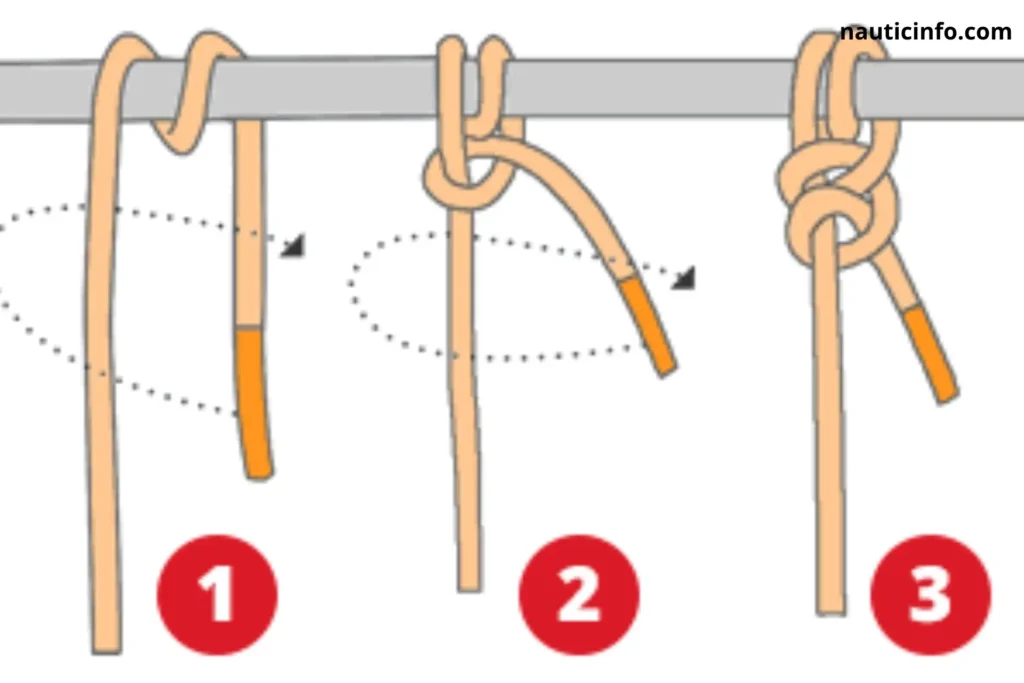
Tying it is as simple as its name suggests.
1: The Round Turn As with the cleat hitch, begin by wrapping the line completely around the mooring point. For extra security and chafe protection, you can even make two full turns.
2: The First Half-Hitch With the working end, make a loop around the standing part and pass the working end through it. Tighten this first half-hitch.
3: The Second Half-Hitch Repeat the process, making a second half-hitch in exactly the same way as the first. It is crucial to make both half-hitches in the same direction to form a clove hitch around the standing part.
4: The Final Cinch Pull the second half-hitch firmly against the first. The knot is now secure.
In conclusion, mastering these five essential sailing knots forms the foundation of any good sailor’s skillset. Take the time to practice them regularly with different types of lines until tying them becomes second nature. Because at sea, more than anywhere else, safety often depends on the strength of a simple knot. So, grab your lines, and fair winds!